|
|
|
|
The EPSDisk v1.30b Tutorial
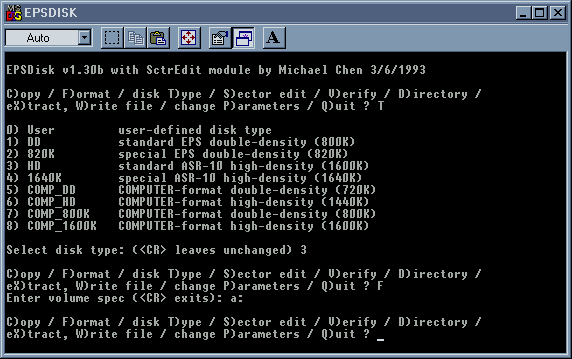
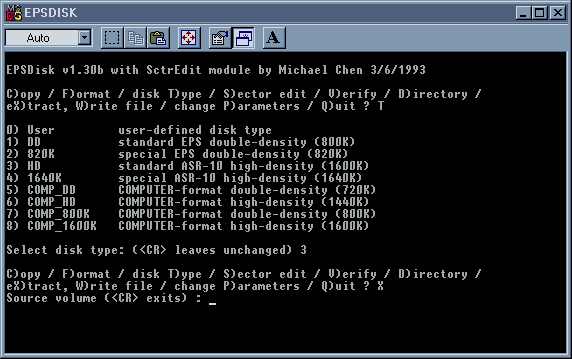
You will need: EPSDisk, an EFE instrument file, and a unused diskette. If you do not have EPSDisk, then you could download it in the d o w n l o a d s section. To get some EFE files, try going to s o u n d . c e n t r a l, they have many keyboard, bass, and drum sound files to download in EFE format. Purpose: To format a disk using EPSDisk. To write an EPS disk image into an ASR or EPS formatted disk. Also to extract an already made ASR or EPS disk containing instruments into a disk image for the PC (so you could upload them and share them with your internet pen pals). Introduction: EPSDisk is a DOS based program that is not very user friendly. The whole program looks like a programming project from a computer science class at some college institution. It feels like the type of program I would be writing. Nevertheless the program seems to be very stable for me and has never crashed my system. This program can get very complex once you go in depth with it, asking for HEX and ASCII values (for some reason) that just perplex me. Despite all that chaos, I will take you through step by step into using this program with its three main purposes. This will be easy after you get the hang of this, trust me. Matter fact, it'll be easy after you read this. Okay, lets start. You need at least three things here, the EPSDisk program execution file, an ensoniq disk image (whatever.efe), and a formatted diskette. First of all, if you haven't formatted your disk yet then do so. You can do this on the EPS/ASR-10 or on the PC using EDE or EPSDisk. Formatting on EPSDisk: Insert a diskette that you want to format. Open up EPSDisk and you will get a menu screen. Enter T to select that type of disk that you are formatting. We will use the ASR 10 for this example, so I have to entered 3.  Then we continue on and enter F to format our disk. 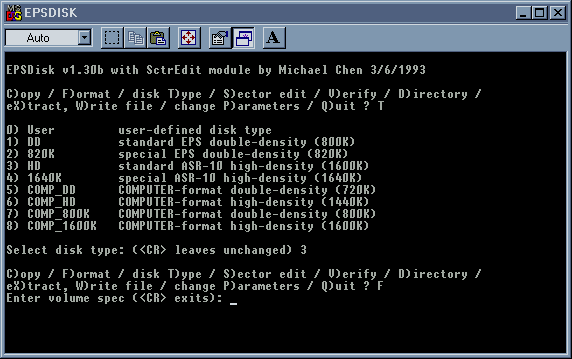 Then we get a confusing "Enter volume spec ( Then hit enter and it should format the disk. It will do some math and calculations and display numbers, after when it is done it will return to the menu again.
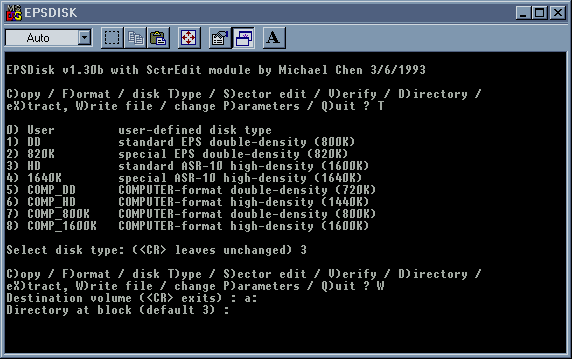
Writing to the diskette:
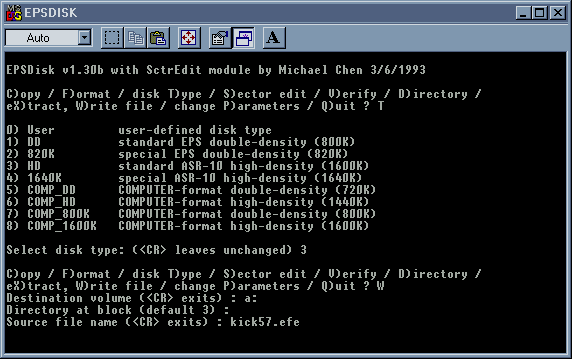
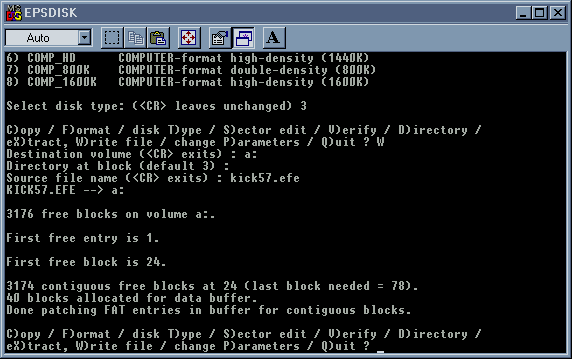
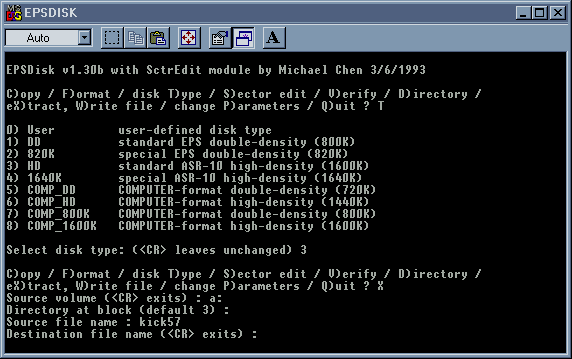
Okay now that we got the diskette formatted, we now want to write a file into the disk. Let's say that we have a file called "kick57.efe". It's just a simple kick drum. Well, this file will be written as an instrument file on the disk. Thus after we write this file, fire up the ASR 10, insert the disk, we will get one instrument called "kick57". Once this instrument is selected, the key range of the kick drum will be all the keys on the board with C5 as the root key, in most cases. The root key and the range would differ if the file was saved in a different manner.
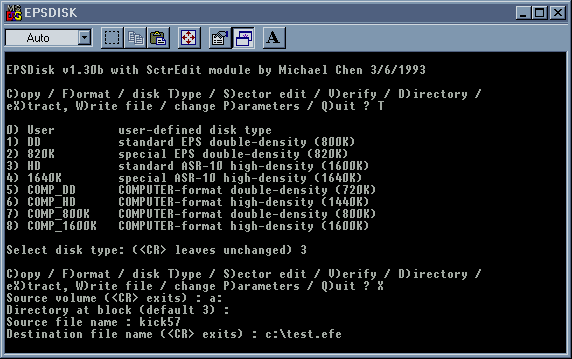
Let's do it. Enter T and select the type of disk. Select the appropriate format. Enter W to write a file onto the disk. Now we get a "Destination volume ( Then we get a "Source file name ( After I hit enter I get this screen which means it has been successfully written, otherwise I would have gotten a -1 error message. That's it, I'm done. Writing instrument files with over 60 sounds lined up in all the keys (such as large drum kits) works the same way.
Extracting a disk:
Okay you got some dope samples on an ensoniq formatted disk and want to get them onto your PC to share with your internet pen pals. EPSDisk can do this also. The process is similar to writing a file. Get you diskette with all the dope samples and put it into the disk drive. Enter the T and select the appropriate disk type and then enter X to extract the disk. Enter the drive letter for the "Source volume" and hit enter on "Directory at block" as usual. Now, enter the name of the instrument where all the dope samples are in. For this case I will use that same instrument I just wrote, kick57 (not so dope since there's only one kick in the entire instrument). Whatever, it will do for this example. Important, for the "Destination file name ( On the other hand, if I wanted as an "ins" file, I would have just put "c:\test". Press enter and that's it, now look in the C:\ directory and I should find the file there. Of course you could have made a folder in the C drive and called it "dopesamples" and use "C:\dopesamples\test.efe" if you wanted to. And that's how you extract a disk, you could probably do all of these things I explained with zip drives and etc., but I never tried it. As for the other functions in EPSDisk, I wouldn't even bother. You on the other hand could explore if you want to, peace.
|